This post will probably contain more details that you ever wanted to know about making a brooch bouquet. If you don’t care all that much, just glance through the photos and marvel at my super-awesome cell phone picture-taking skills. Because they’re that good.
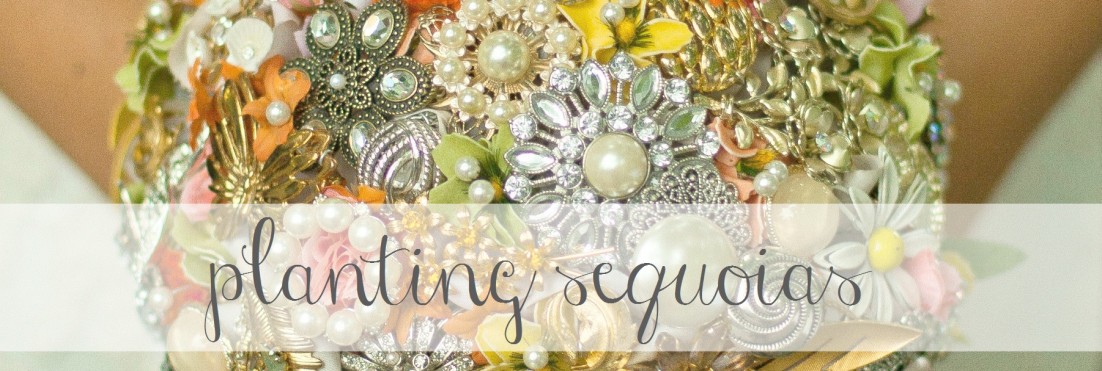
As I, uh, teased here, I made a brooch bouquet for me to carry at our wedding.

(Like this? Pin it!)
The story begins one winter day while I was browsing Pinterest. Of course.
As I often think while I browse this treasure trove of time-sucking projects, I thought to myself, “I could do that!
Little did I know what an enormously stressful project this would be…but one that had such a huge payoff. And here’s the thing: you can do this too. Here’s how.
First, figure out if you are actually committed. This is almost as big a decision as the one you made when you decided to marry your guy, so think it through. Brooch-bouquet making, like marriage, is not for the faint of heart. I began this process in January, oh, about 8 months before the big day.
Then begin the fun process of collecting your brooches. This will be the honeymoon phase of your relationship with your bouquet. You’ll be blissfully unaware of what is ahead and will dreamily assemble a lovely cast of trinkets.
Here are some tips:
- Ask your mom, your mother-in-law-to-be, your grandmothers.
- Don’t keep your brooch-bouquet making a secret, because people will be on the lookout for you and it is awesome.
- Also, comb thrift stores and craft stores. I set a personal rule to not spend more than $3 on a brooch, and if I spent $3, I had to really love it.
- While you are assembling your brooches, think outside the box. Large clip on earrings? Perfect. Pendants for necklaces? Those’ll work.
- Oh, and you’ll probably want to decide on a color scheme before you embark on this journey…my color scheme was gold and silver and pearls. (I do realize that “pearls” is not a color. Just go with me here.)

This was a haul my mom got at a thrift store. Because I’m cheap, I love the fact that big earrings are 2 “brooches” for the price of one. Mmm.

Most of these are from my family’s stash of jewelry from grandmas, aunts, moms, etc. These are the ones that have the most meaning for me. 🙂
As you are collecting, you can now move on to the exhausting process of making all of your lovely brooches into flowers. Here’s what worked for me:
1. I first put 3 (ish) strands of 14″ wire on each brooch, twisting the wire together under the brooch to create the stem. You’ll probably want to use a pliers to do this to save your delicate fingers. And pace yourself; spend a little time doing this each day. You’ll get tired of it soon and your fingers will want to fall off your body. I used silver floral wire from Michael’s (yup, used a coupon). Each brooch is different, so you might have to get creative for how you attach the wires.

There is really no excuse for the quality of these photos. Or for the fact that we still had Christmas decor up in February. Or for the fact that I eat frosting straight out of the can by the spoonful.
2. After I had created the wire stem, I wrapped each stem with floral tape (I used white), beginning right under the brooch and working down to the end of the “stem”. You couldn’t see the floral tape in the final product, but it did add bulk to the wire-y stems and made things more secure.
No pictures of this, because I am that awesome.
3. Once I had floral-taped the stems, I then took 2 fake rose petals and hot-glued them underneath the brooch, creating a sort of bud. This will help with the final product because it softens up each brooch and disguises the fact that your bouquet is indeed made out of metal.
You guessed it. No picture.
4. Do steps 1-3 over and over and over and over and over. My final bouquet had about 80 brooches/earrings/pendants. It helps to have a very supportive roommate to whom you can express your deepest fears to (that it will all be for naught and look terribly tacky) and who will encourage you when those deepest fears come true (“I know you can do it! Keep trying! That, uhhh, looks good!”). Said roommate is also useful to borrow a hot glue gun from (Laura, my bouquet owes its life to you. Thank you.)
If you have made it this far (either in making this bouquet or in reading this epic post), you deserve a high five for sure. Stop right now and get one from your roommate.
Now, you can do the “fun” part! Simply grab your bouquet and go!
Just kidding. It’s not that easy.
First, hydrate. Take long, deep breaths, and begin assembling your bouquet. You’ll have to position each “flower” exactly how you want it to fit into your bouquet. It’s like a really difficult puzzle that makes your hand cramp up frequently. As you position each flower, every 5 brooches or so, wrap the overall stem with floral wire to keep things together. Unless you have like 8 hands or the dexterity and hand strength of a surgeon.
Keep an eye on the overall shape of your bouquet. You don’t want it to have a flat top, and you probably don’t want it to curve down too quickly. If you’re like me, you want a smooth dome shape that is about 8 inches wide. I had to take my bouquet apart multiple times and redo this step.
Here’s an optional bonus–I also dropped in a few fake flowers in my color scheme to soften up the harsh metal of the bouquet and add some color. I didn’t want the fake flowers to take center stage, so I usually positioned them slightly lower in the dome than the brooches.
Remember, keep wrapping the ever-growing stem with floral tape to keep things together.
Eventually, you should have something like this:

Here you can see the floral-tape wrapped stems. You can’t see the floral tape that is keeping it all together, since I just did that at the top of the stem. Oh, here is that picture:

You can also see the way I created the “buds” out of the fake rose petals here.
After this, I added a few fake leaves at the bottom of the dome to soften up the bouquet and clipped the wires to be a uniform length at the bottom.
The stem of my bouquet at this point was a bit to spindly for my liking, so I bulked it up a bit with sticks. Yes, I literally went outside and got some sticks and then clipped them into 8 inch (ish) chunks and mashed it all together on the stem. I used duct tape to bulk it up too and make it super strong.
Next, I pinned loops of 1″ wide ribbon up under the bouquet to cover up the wire mess that was visible from underneath. I also covered the bottom of the stem (which was a bit larger than a quarter–maybe a fifty-cent piece in size) with a cardboard circle and 1/4″ wide ribbon. The only unfinished part now was the stem itself, which I then wrapped with 1″ wide ribbon beginning at the top and working my way down to the end. At the end, I folded the raw edge of the ribbon back and used 3 pearl pins (like the type used to pin corsages) to secure it.
It will probably be the beginning of summer by this time, if you’re anything like me. You’ll have spent many sleepless nights mentally rearranging brooches and trying to figure out what your back-up plan is.
If you’re not content with how your bouquet looks, keep tweaking it. I thought mine was a little too smooth and dome shaped, so I added some texture and visual interest by jabbing pearl pins into the fake flowers. I also thought that the bottom was a little boring, so I draped some pearl necklaces and bracelets from the lowest layer of brooches. These are easily removable if I ever want to wear them the normal way.

Here you can see the leaves, the way I looped the ribbon and pinned it to the underside of the bouquet, the secured ribbon wrapped around the stem, the pearls I jabbed into the fake flowers, the extra necklaces and bracelets I looped on the underside, yada yada yada…
And voila! It’s done when you say it’s done. I had to put mine away so I would stop tweaking it. 🙂 Oh, and don’t forget to plan the rest of your wedding.
Also, don’t forgot to do those arm workouts before the big day. This bouquet is a monster. It probably weighs about 5 pounds, but I haven’t scientifically measured it yet. The day after the wedding, yes, my arm was SORE. But still. WORTH IT.
")
")
Now go forth and make your own. 🙂
Questions? ASK AWAY! I check comments frequently and would love to help. I can also take more pictures of my bouquet if you’re a visual learner. Just let me know!
Update: Here’s a better photo of the underside of the brooch bouquet:

")


")
")

